 MAPu
Features
What MAPu does, one sentence each.
Map and 3D
- A moving map — with streets, street names, the route so far and your position, frame by frame; it can turn with your heading.
- Snap to road — a position that GPS noise puts beside the road goes onto the road, with an adjustable tolerance.
- 3D map — with terrain and 3D buildings.
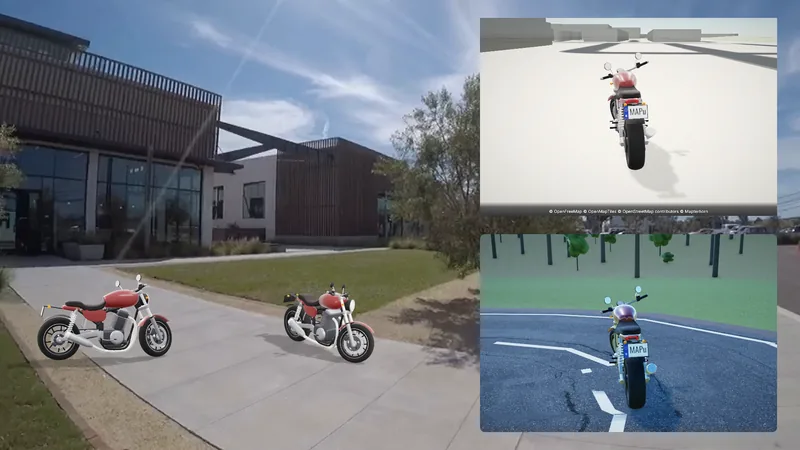
- 3D vehicle on the map — the vehicle's 3D model drives on the real map, with the light of the recording's time.
- Live 3D vehicle — it steers, leans, dips under braking and rides on its springs — from the recording's real data.
- Built-in vehicles — Car, Motorbike, Bicycle, E-scooter, with a colour picker; your own 3D model (.glb) can be loaded too.
Widgets and editor
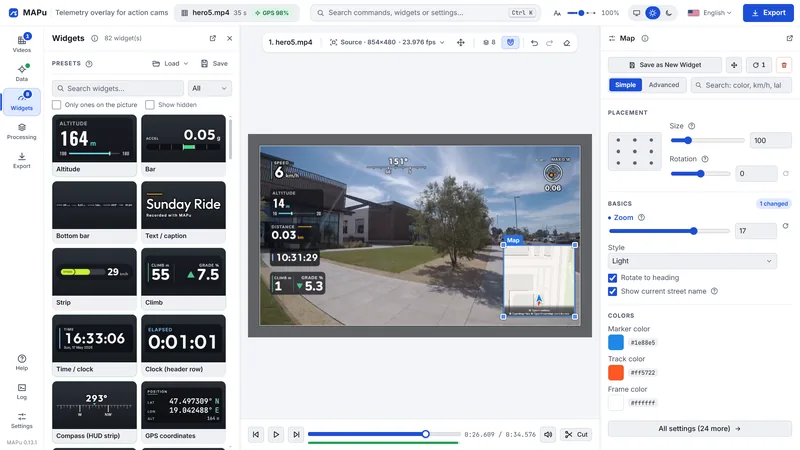
- 75 widgets — in 13 categories: speed, heading, altitude, time, distance, G-force, heart rate, GPS reception, car data and "any data" building blocks.
- Drag and drop — from the gallery onto the picture; move (hold Shift or Ctrl: only horizontally or vertically), resize from any of the four corners, and rotate with the mouse (click the selected widget once more).
- Magnetic snapping — when moving or resizing, a widget gently snaps to the edges and centres of the other widgets, the video and the frame, with a faint guide line; it can be switched off.
- Several widgets at once — selected together, they move and delete together, can be made the same height, aligned and spaced with equal gaps; their shared settings change together.
- Every label can be changed — and a widget's elements (label, number, mark) can be moved or removed one by one.
- Presets — save the layout under a name, or start from a shipped preset.
- Your own widget — one file in your widget folder, with a documented contract; the Help explains how.
GPS and data
- GPS from the camera — read on its own from GoPro, Insta360, DJI and many dashcam videos.
- 11 data file formats — GPX, FIT, TCX and motorsport logs — from a watch, a bike computer or a phone.
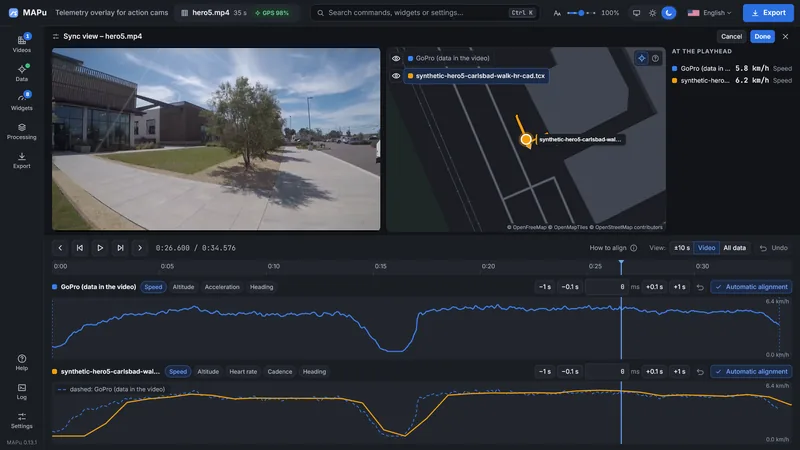
- Several sources on one video — with a primary and a fallback per data type, say the position from the camera and the heart rate from your watch.
- Automatic timing — a data file is lined up with the video by its timestamps; the sync view checks it on a map and fine-tunes it.
- No made-up data — where the source did not measure, the widget shows "--", not a number.
Video and GPS processing
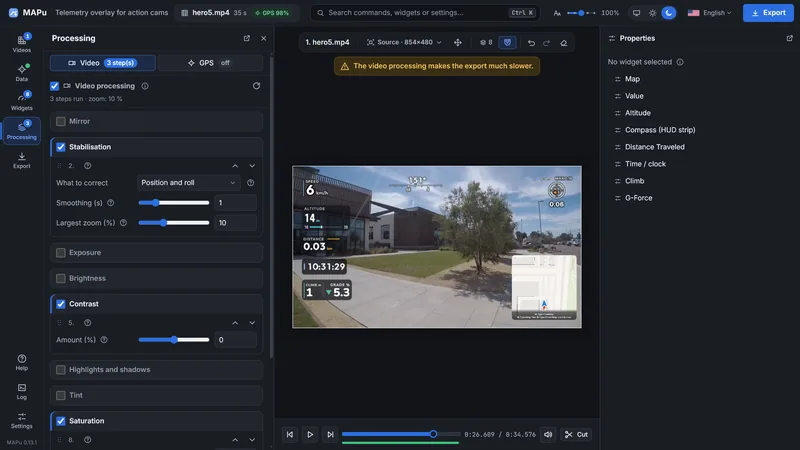
- Video processing — stabilisation, exposure, contrast, colour, sharpening, vignette — the preview shows it live, the finished video gets the same.
- GPS processing — drop spikes, pull a wandering position into one point while you stand still, smoothing, upsampling.
- Cutting — trim the start, the end and parts in the middle; the widgets' data follows the cut.
- One recording, one video — a recording split into pieces becomes one film; the rear camera can go on the picture in a small window.
360° recordings
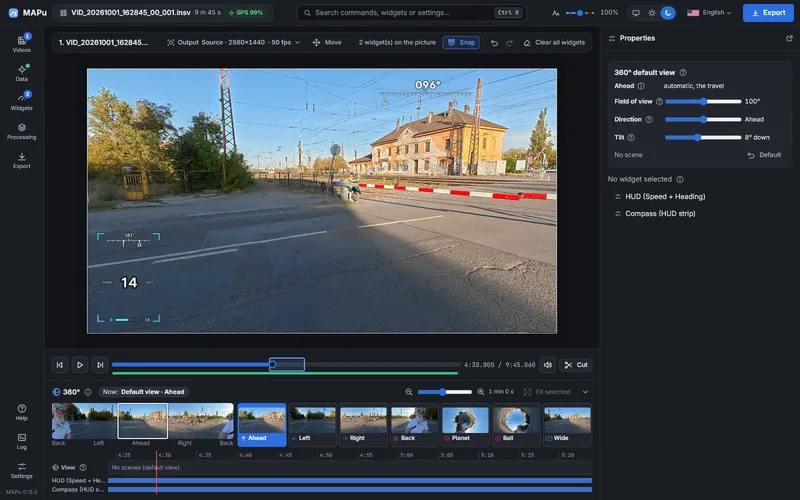
- Insta360 X6 — its two-lens .insv recording opens: the two lenses joined into one picture with the camera's own calibration, the horizon level, the picture looking along the travel. No other 360° camera has been tried yet.
- Automatic “Ahead” — after opening, MAPu measures the direction of travel once, in the background, from the picture; the “Direction” slider fine-tunes it.
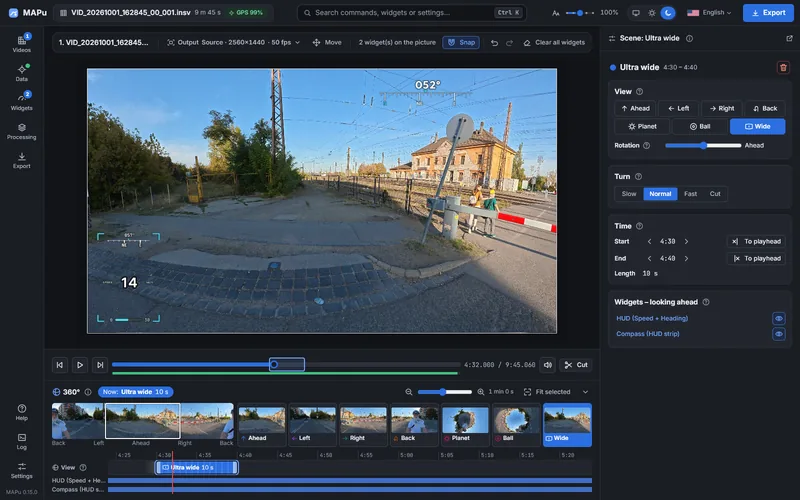
- Views — Ahead, Left, Right, Back, and special views: Little planet, Crystal ball, Ultra wide.
- Scenes — on the 360° strip under the play bar, one click turns the picture another way for 10 seconds from here, with a soft turn; the scenes move and resize on a zoomable timeline.
- Widgets per view — each widget can be set to show in some views only.
- The “360° view” widget — a second view on the picture, for example a rear-view mirror; at a scene change it hides, switches camera or keeps.
- Preview = export — the finished video gets the picture the preview shows; the export takes much longer than a plain video's.
Export
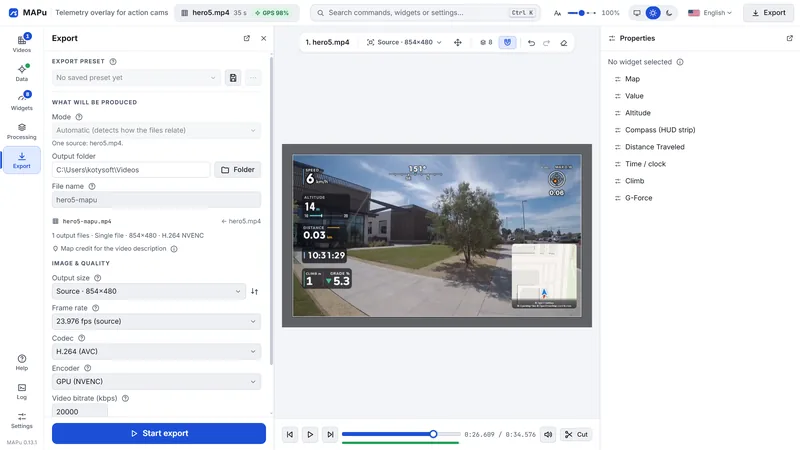
- Output size — the video's own, 4K to 720p, vertical 9:16 (Reels, Shorts, TikTok), 4:5, square or custom; the widgets follow the new frame, with a background of any colour or the blurred video around it.
- Codecs — H.264 (AVC), H.265 (HEVC), AV1 — hardware encoding on a graphics card (AMD: AMF, Intel: Quick Sync, NVIDIA: NVENC), the CPU otherwise.
- Graphics card — the card that decodes and the one that encodes can be chosen separately; at startup the program tries which card handles which formats and sizes, and shows this as labels. If the chosen decoder cannot handle a video, the program says so on import and tells you what decodes it instead.
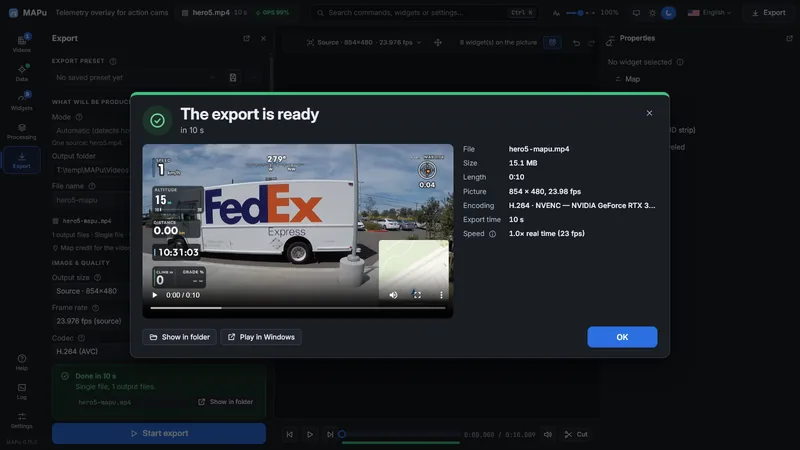
- The export is ready — at the end a dialog with the finished video (the player does not start on its own) and the measured figures: size, length, frame size, encoding, export time, speed.
- When done — after the export the computer can go to sleep, hibernate or shut down; first a countdown, which one click stops.
- Frame rate — your choice; in-between frames for a higher rate, three ways.
- Export presets — save the settings that work for you under a name.
The program
- Everything on your computer — no account, no upload, no tracking; only map tiles and the update check go over the network.
- One installer — with ffmpeg, the map style and the fonts inside; nothing else to download.
- English and Hungarian — light or dark, with an adjustable interface size.